Create a Dataset
A dataset is a collection of documents (entries) inside a data cluster. When you create a dataset, you define its metadata schema and configure how uploaded documents are processed through a pipeline.
Dataset creation is a four-step wizard that guides you through naming, schema selection, field customization, and pipeline configuration.
Prerequisites
- An active data cluster to host the dataset. If you do not have one yet, follow Create a Data Cluster.
- Write access to your organization.
Step 1: Open the Dataset Creation Wizard
- Navigate to Clusters in the dashboard.
- Click on the cluster where you want to create the dataset.
- From the cluster detail page, click Create Dataset (or navigate to the Datasets tab and click the create button).
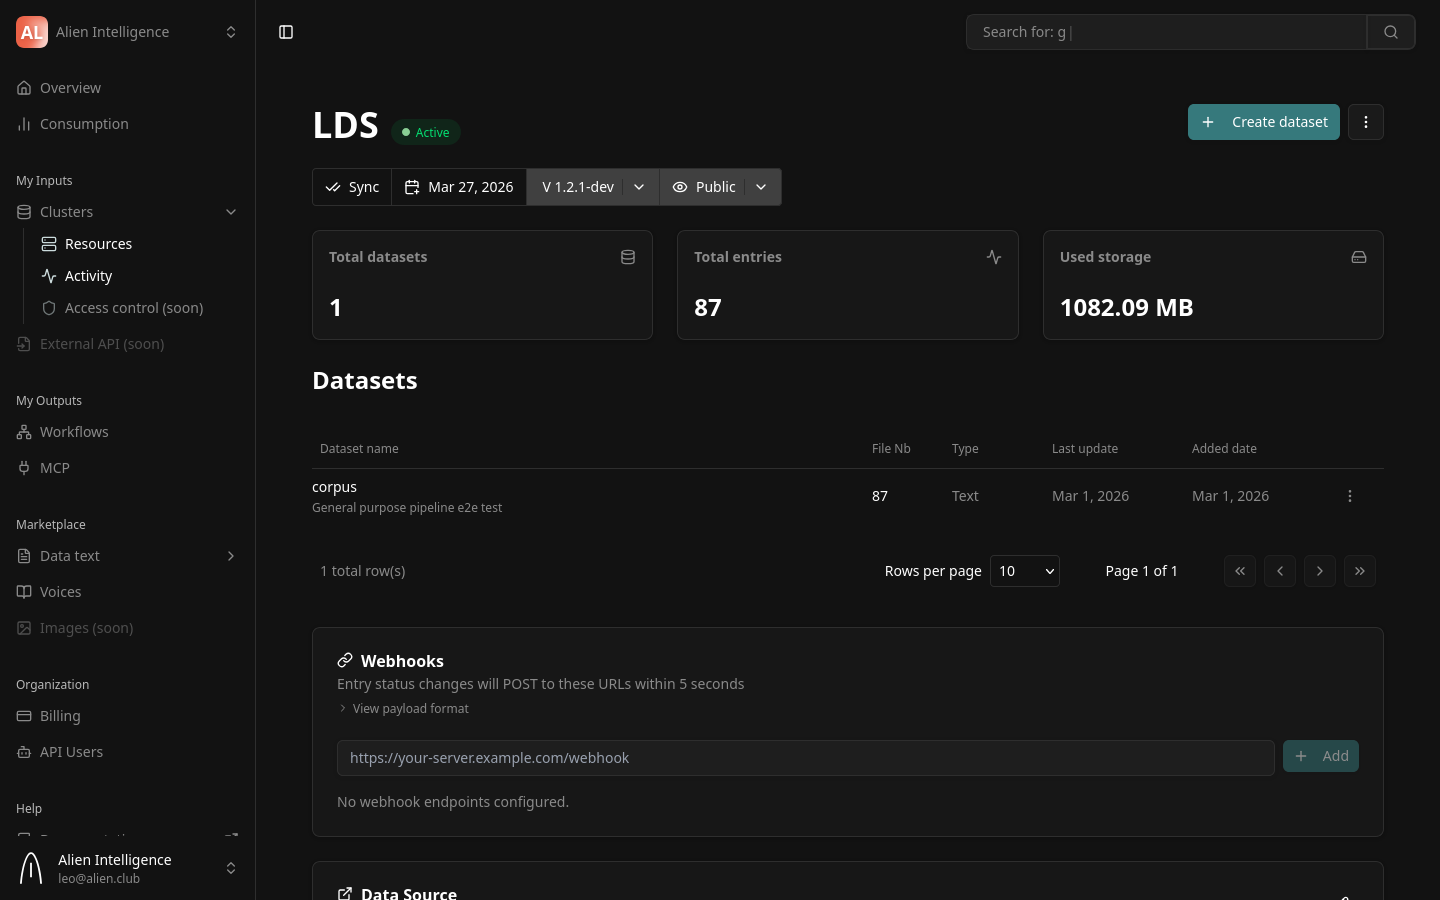
The dataset creation wizard opens with four steps: Create Dataset, Schema, Fields, and Pipeline.
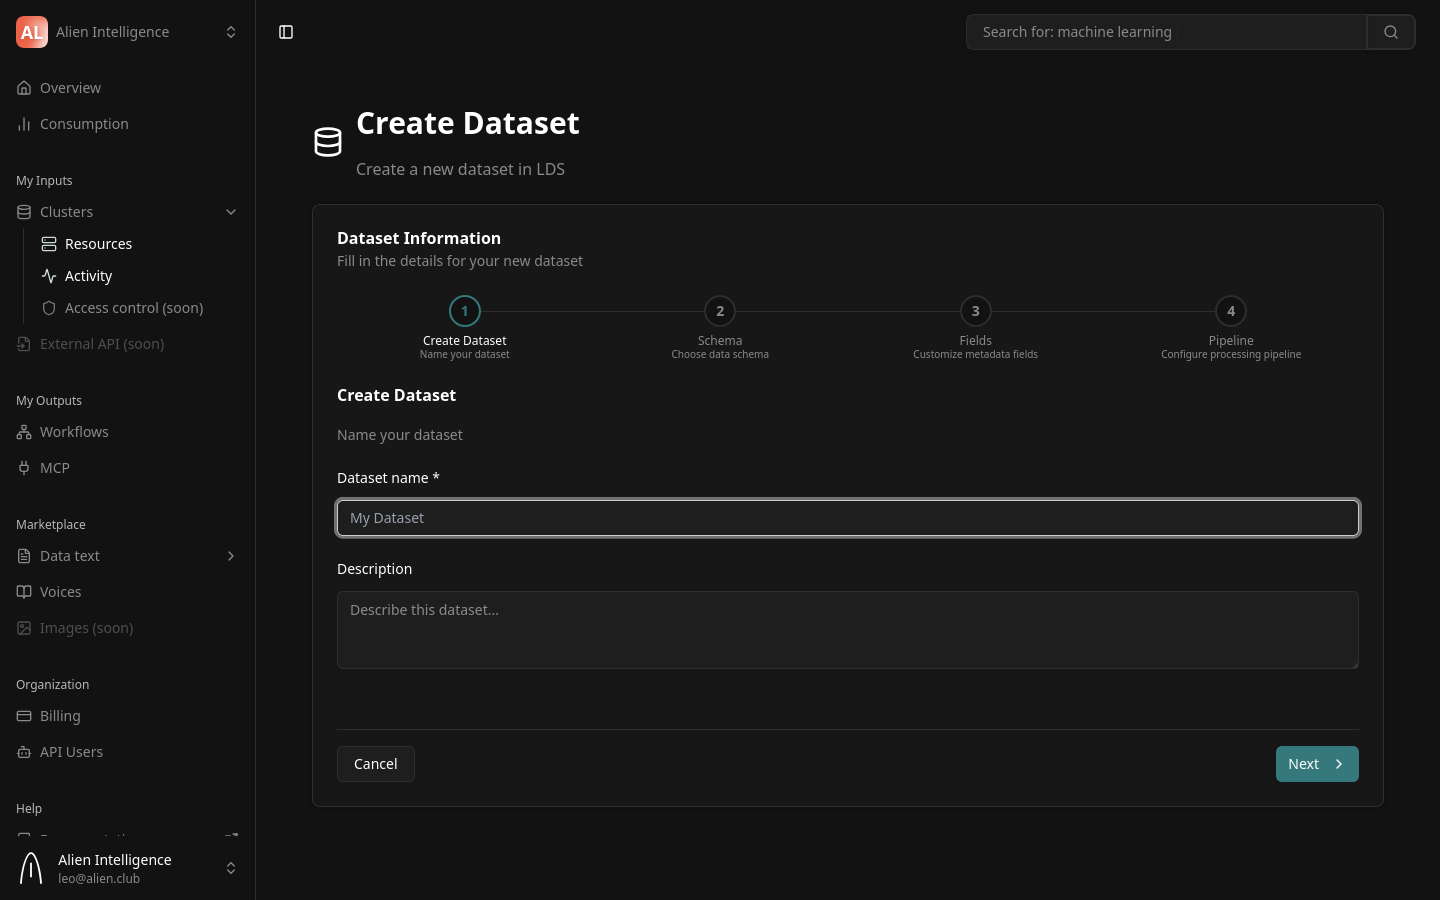
Step 2: Name Your Dataset
| Field | Description | Required |
|---|---|---|
| Dataset name | A descriptive name for the dataset (minimum 3 characters) | Yes |
| Description | A brief description of what this dataset contains | No |
Examples:
- Name:
bioRxiv Preprints 2024/ Description:Pre-publication biology and life sciences papers from 2024 - Name:
Product Manuals/ Description:Technical documentation for all product lines
Click Next to create the dataset on the cluster and proceed to schema selection.
The dataset is created on the cluster as soon as you complete this step. If you cancel the wizard after this point, the dataset still exists (with no pipeline configured) and can be configured later from the dataset settings page.
Step 3: Choose a Schema Preset
The schema defines the structure of entries in your dataset — what metadata fields each document has and what file types are expected.
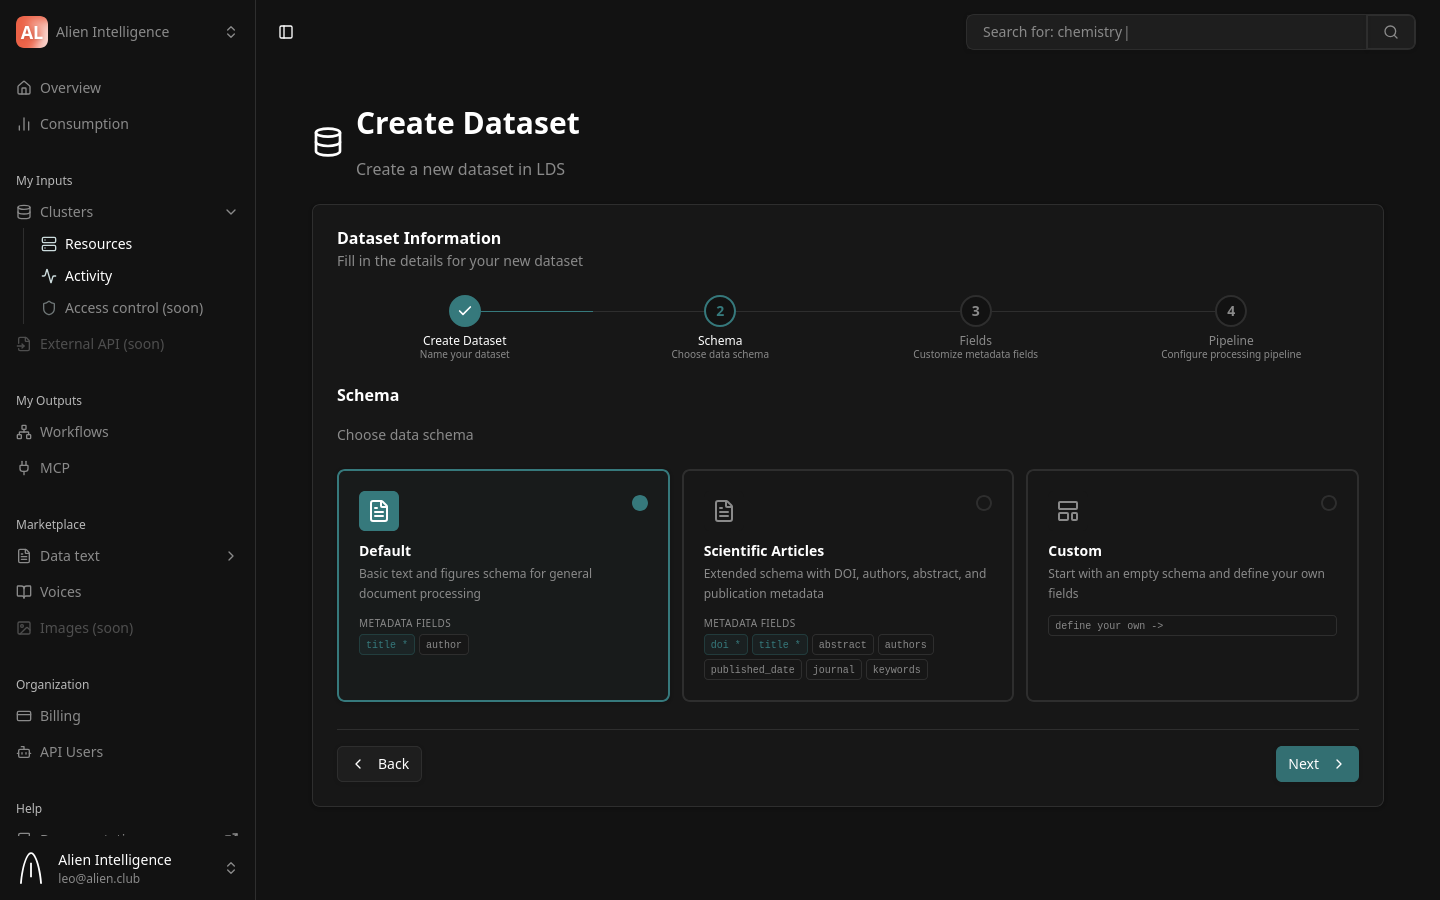
Two schema presets are available:
Default
A general-purpose schema for standard document processing. Expects a PDF file and supports basic metadata:
| Metadata Field | Type | Required |
|---|---|---|
title | String | Yes |
author | String | No |
Scientific Articles
An extended schema designed for academic publications. Includes fields commonly found in scientific papers:
| Metadata Field | Type | Required |
|---|---|---|
doi | String | Yes |
title | String | Yes |
abstract | String | No |
authors | String | No |
published_date | String | No |
journal | String | No |
keywords | String | No |
Select the preset that best matches your data and click Next.
If neither preset fits your needs, you have two options: select the closest preset and customize the fields in the next step (you can add, remove, or modify metadata fields), or choose the Custom option to build your schema entirely from scratch.
Step 4: Customize Fields
Fields are more than labels — they drive key platform capabilities:
- Faceted search — Fields power Meilisearch faceted search, letting users filter entries by specific field values (e.g., filter by author, journal, or date).
- Structured retrieval — Fields enable precise, structured entry retrieval through the API and UI.
- LLM-augmented understanding — AI agents use field metadata for richer context when answering questions about your data.
- Well-defined fields make your data more discoverable, filterable, and useful across the platform.
This step lets you fine-tune the metadata fields from the schema preset.
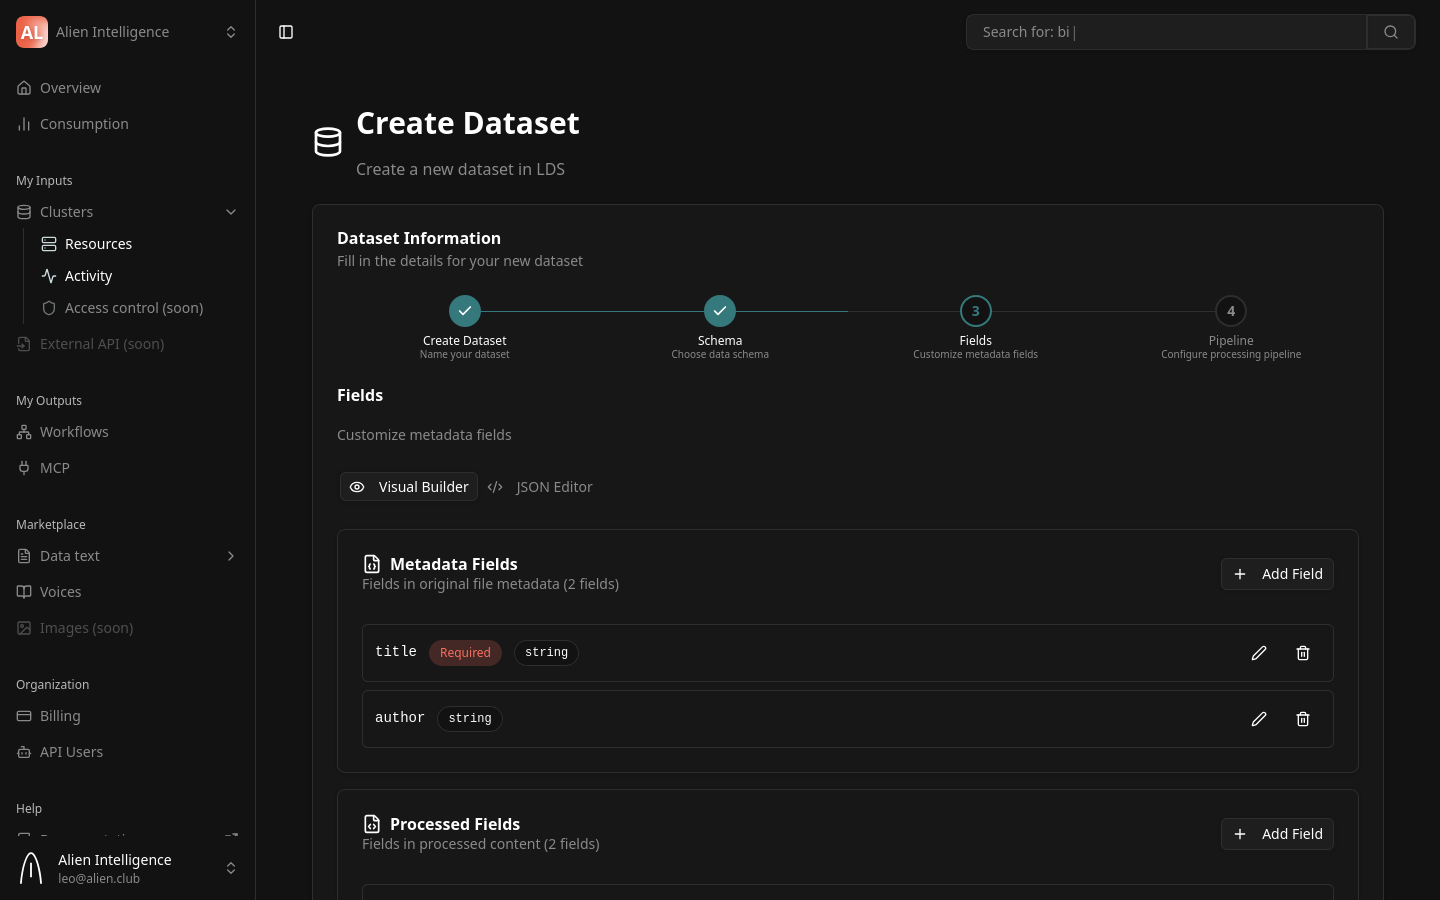
You can:
- Add fields — Define additional metadata properties for your entries
- Remove fields — Remove preset fields that are not relevant
- Change field types — Modify the data type of a field
- Mark fields as required — Control which fields must be provided when creating entries
The field customizations are saved to the dataset schema. All entries in this dataset will follow this schema.
Click Next to proceed to pipeline configuration.
Step 5: Configure the Processing Pipeline
The pipeline defines how uploaded documents are automatically processed into searchable content. This is the most important configuration step — it determines what happens when you upload a file.
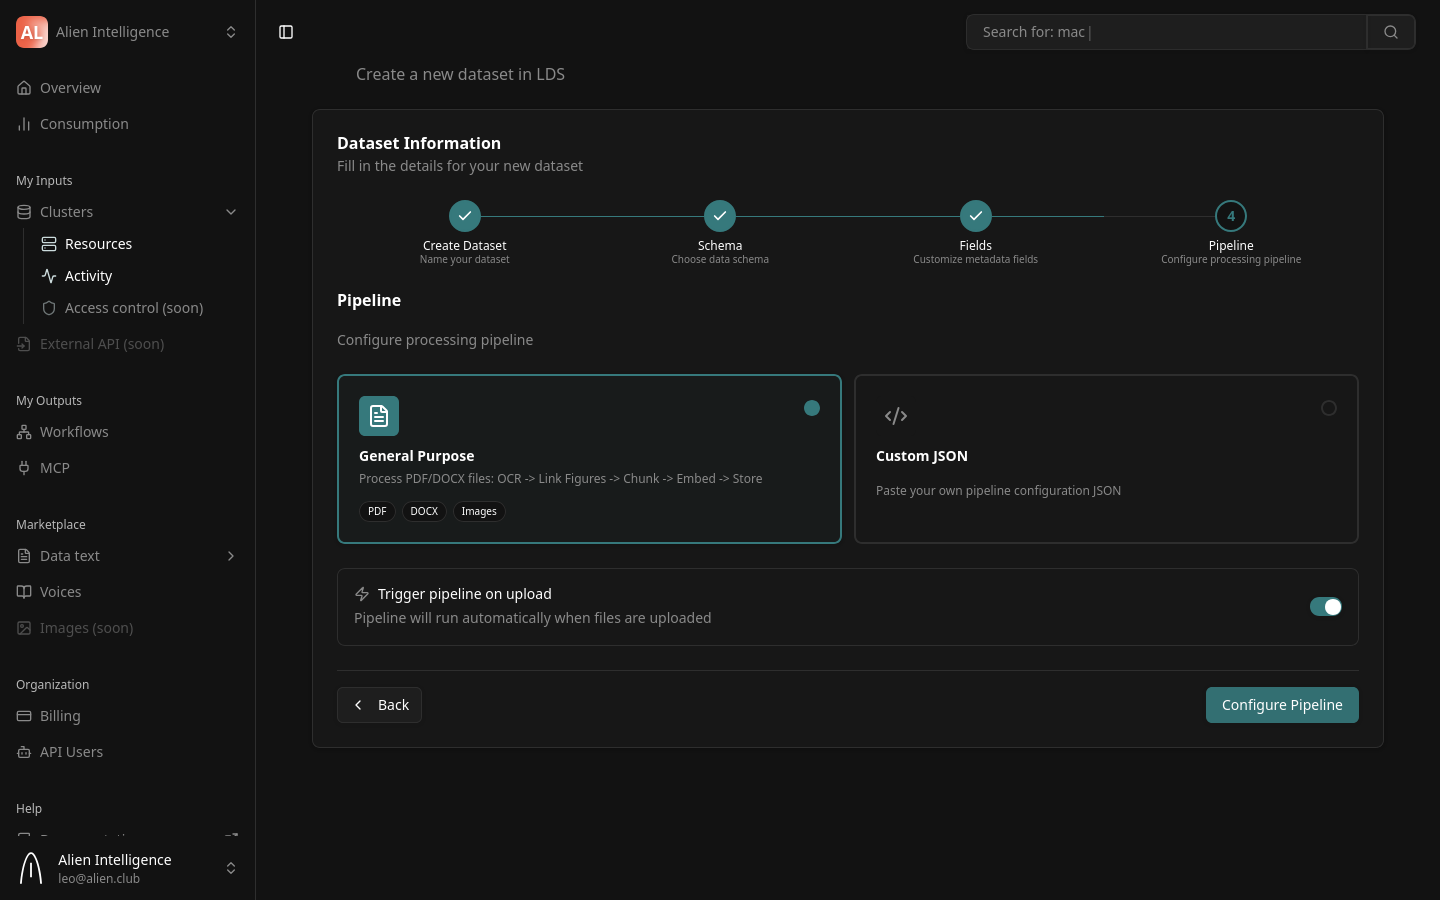
Pipeline Preset: General Purpose
The platform ships with one production-ready pipeline preset:
General Purpose — Processes PDF, DOCX, and image files through a complete pipeline:
Upload -> OCR -> Link Figures -> Chunk -> Embed -> Store
This preset runs the following processing stages:
| Stage | What It Does |
|---|---|
| Fetch Entry | Downloads the uploaded file from cluster storage |
| OCR | Extracts text and images using Mistral OCR |
| Link Figures | Resolves figure references in the extracted text and converts images to PNG |
| Register Figures | Saves extracted figures back to cluster storage |
| Chunk | Splits extracted text into semantic chunks (1,024 tokens with 128-token overlap) |
| Embed | Generates embedding vectors for each chunk using the cluster's configured embedding provider |
| Store Chunks | Saves chunk text and embedding vectors to the vector database |
| Save Content | Saves the processed text content to cluster storage |
| Update Status | Marks the entry as "processed" |
Custom JSON
If you need a different pipeline configuration, select Custom JSON and paste your pipeline configuration. Custom pipelines compose the same underlying components in a different order or with different parameters.
Contact us at contact@alien.club — we can provide tailored JSON pipeline configurations for your specific use case, including custom processing stages, parameters, and component ordering.
A visual pipeline editor is under development. Currently, custom pipelines require a JSON configuration.
Auto-Trigger
A toggle at the bottom of the pipeline step controls automatic processing:
- Enabled (default) — The pipeline runs automatically whenever a file is uploaded to this dataset
- Disabled — Files are uploaded but not processed until you manually trigger the pipeline
Keep auto-trigger enabled unless you need to batch-upload many files and trigger processing later. Auto-trigger ensures every uploaded document is immediately processed and becomes searchable.
Finish
Click Configure Pipeline to save the pipeline configuration and complete the wizard. You are redirected to the dataset detail page.
What Happens After Creation
Your dataset is now ready to receive documents. Here is the state after completing the wizard:
- The dataset exists on your cluster with the configured schema
- The pipeline is configured and (if auto-trigger is enabled) will process any uploaded files
- No entries exist yet — the dataset is empty
From the dataset detail page, you can:
- Upload documents — Add files that will be processed by the pipeline
- View entries — See the list of documents and their processing status
- Modify settings — Change the dataset description, schema, or pipeline configuration

Understanding Pipeline Configuration
The pipeline configuration is stored as JSON on the dataset. Each step in the pipeline specifies:
- Component — The processing component to run (e.g.,
mistral-ocr-processor-1.0.0) - Dependencies — Which steps must complete before this step runs
- Inputs — Artifacts from previous steps that this step consumes
- Outputs — Artifacts this step produces for downstream steps
- Parameters — Configuration specific to this component
Steps run as a directed acyclic graph (DAG) — steps with no dependency on each other can run in parallel. The platform handles scheduling, retries, and artifact passing automatically.
For details on pipeline architecture and all available components, see Pipelines (Concept).
Next Steps
- Upload Documents — Add files to your dataset and monitor processing
- Configure Pipeline — Modify pipeline settings after dataset creation
- Datasets and Entries (Concept) — Understand the data model in depth
- Pipelines (Concept) — Learn about all available pipeline components and presets