Create a Data Cluster
A data cluster is an isolated environment with its own database, storage, vector search, and full-text search. Each cluster is provisioned automatically — you fill in a form, and the platform handles the infrastructure.
Prerequisites
- You are signed in and belong to an organization with write access.
- An active data plane is available. For Alien Hosted customers, a default data plane is already configured. For on-premise deployments, follow Create a Data Plane first.
Step 1: Open the Create Cluster Dialog
- Navigate to Clusters in the dashboard.
- Click the Create Cluster button in the top-right corner.
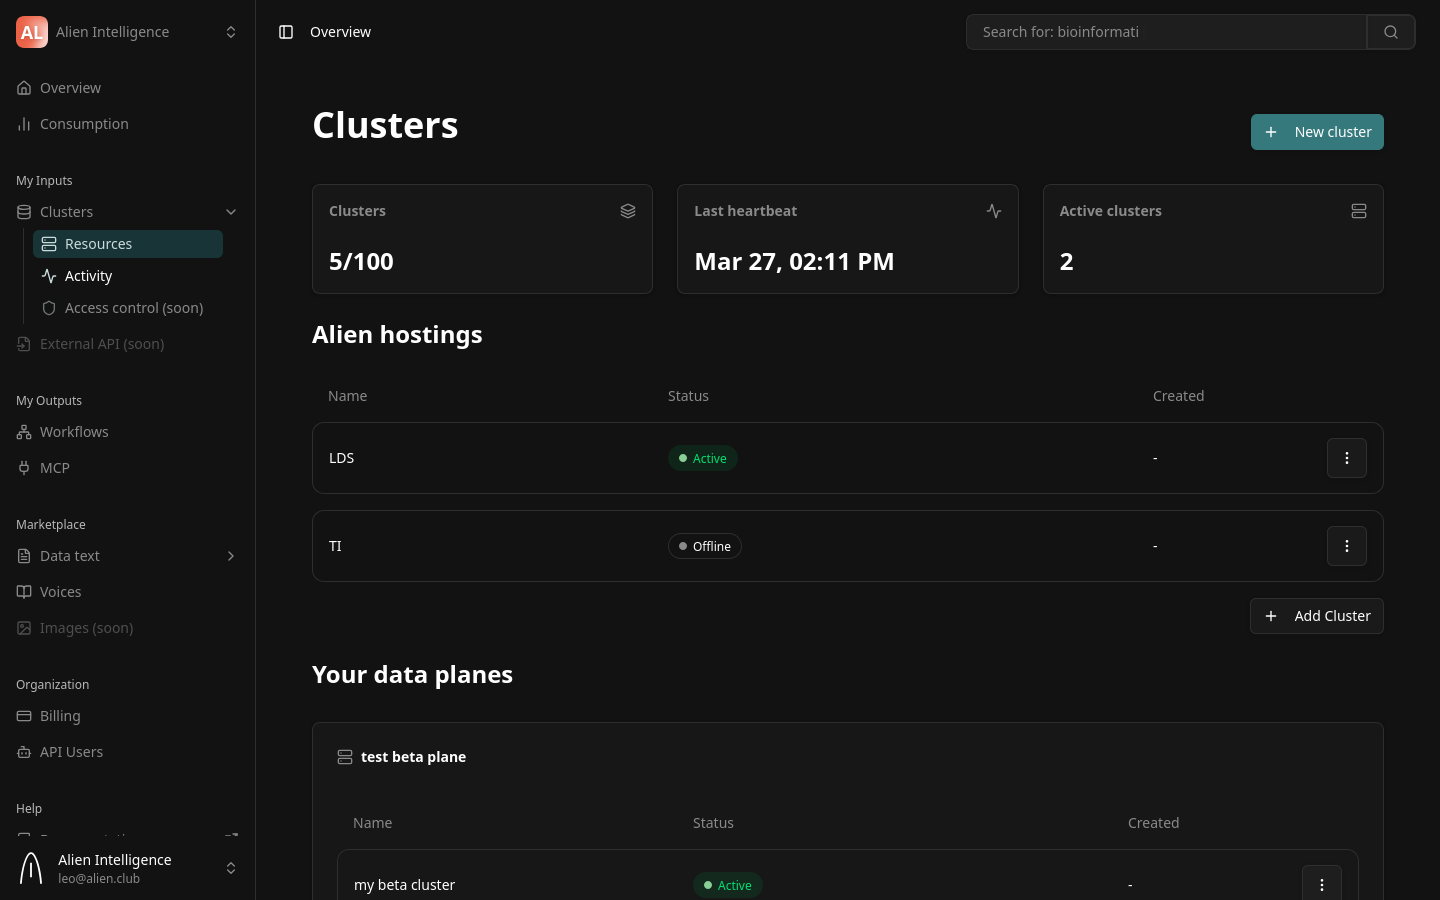
The "Create New Cluster" dialog opens.
Step 2: Fill in Cluster Details
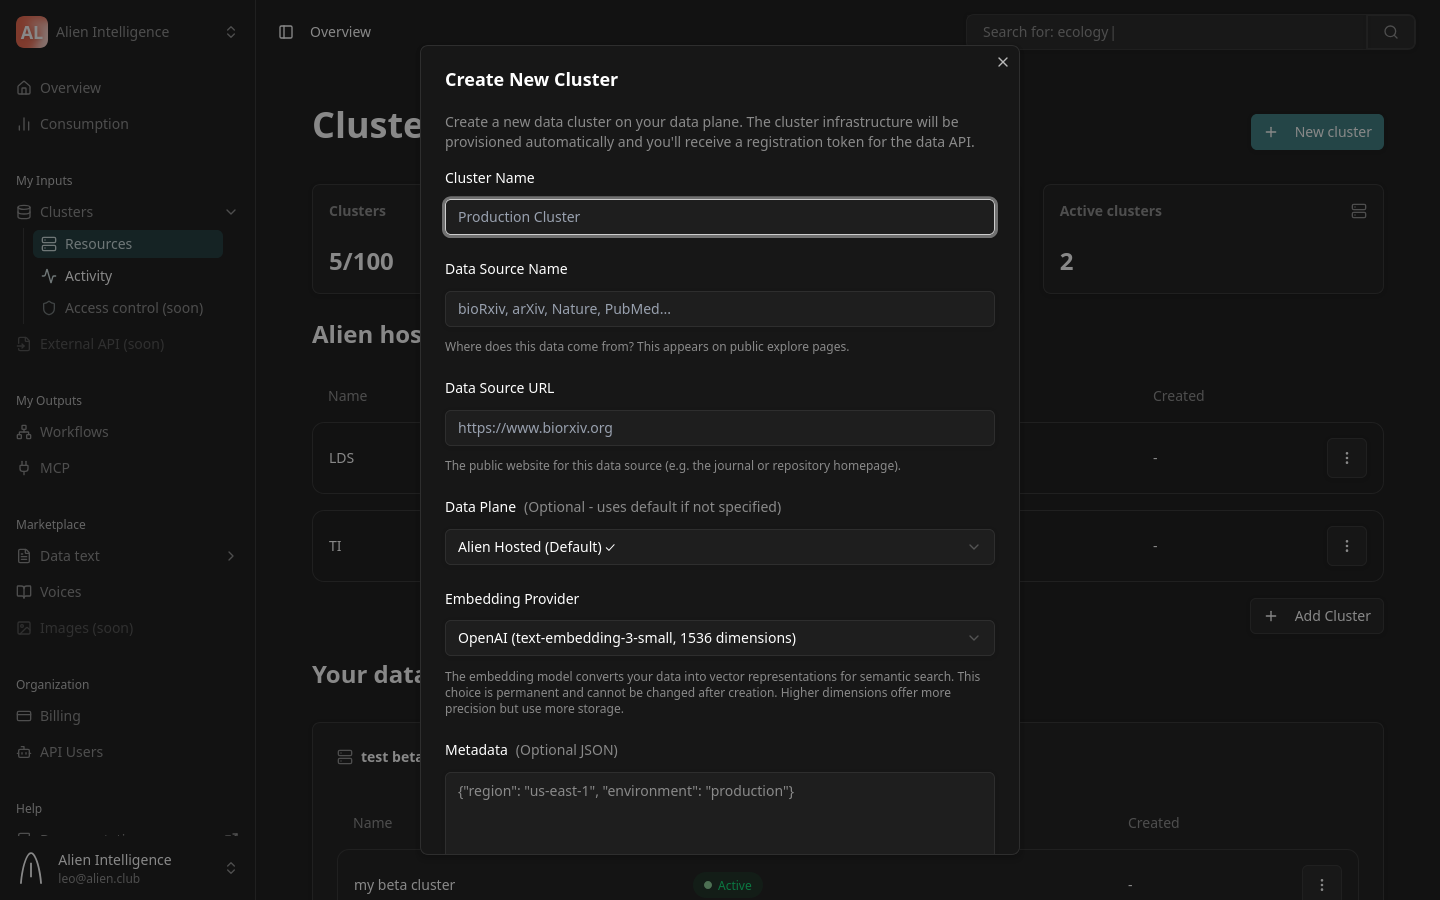
The form contains the following fields:
Cluster Name
Give your cluster a descriptive name. This is how it appears in the dashboard and in API responses.
Examples: Research Papers, Product Documentation, Legal Archive
Data Source Name
Describe where the data in this cluster originates. This label appears on public explore pages if your datasets are public.
Examples: bioRxiv, Internal Knowledge Base, Nature Publishing
Data Source URL
The public URL for the data source (the homepage of the repository, journal, or organization providing the data).
Example: https://www.biorxiv.org
Data Plane
Select which data plane hosts this cluster. If your organization has only one data plane (the default for Alien Hosted customers), it is pre-selected.
For Alien Hosted customers, the default data plane is selected automatically. You do not need to change this unless your organization has multiple data planes for different regions or use cases.
Embedding Provider
Choose the AI provider used for generating text embeddings during document processing. This determines the vector dimensions for semantic search on this cluster.
| Provider | Model | Dimensions |
|---|---|---|
| OpenAI | text-embedding-3-small | 1,536 |
| Mistral | mistral-embed | 1,024 |
| gemini-embedding-001 | 3,072 |
The embedding provider cannot be changed after cluster creation. All documents in the cluster will use the same embedding model. Choose based on your quality, cost, and latency requirements.
If your organization is subject to EU data residency requirements, you must choose Mistral as your embedding provider. Mistral is based in Paris and processes data entirely within Europe. Both OpenAI and Google embedding providers send data to US-based servers, which may not comply with GDPR or internal data sovereignty policies.
Metadata (Optional)
An optional JSON object for attaching custom metadata to the cluster. This is useful for tagging clusters with environment, region, or project identifiers.
{"region": "us-east-1", "environment": "production"}
Step 3: Create the Cluster
Click Create Cluster. The platform sends a provisioning request, and a progress dialog appears showing the cluster being set up.
What Happens During Provisioning
The data plane operator automatically provisions the following resources for your cluster:
- A dedicated Kubernetes namespace
- A PostgreSQL database for metadata
- An object storage bucket for files
- A vector database collection for embeddings
- Full-text search indexes for keyword search
- A Data API deployment to serve your data
- A network connector linking the cluster to the platform
This process typically completes within a few minutes.
During provisioning, the cluster status shows as Provisioning. Once the Data API starts and sends its first heartbeat to the platform, the status transitions to Active.
Step 4: Verify the Cluster Is Active
After provisioning completes:
- Close the provisioning dialog.
- Your new cluster appears in the cluster list on the dashboard.
- Check the status indicator — it should show Active with a green indicator.
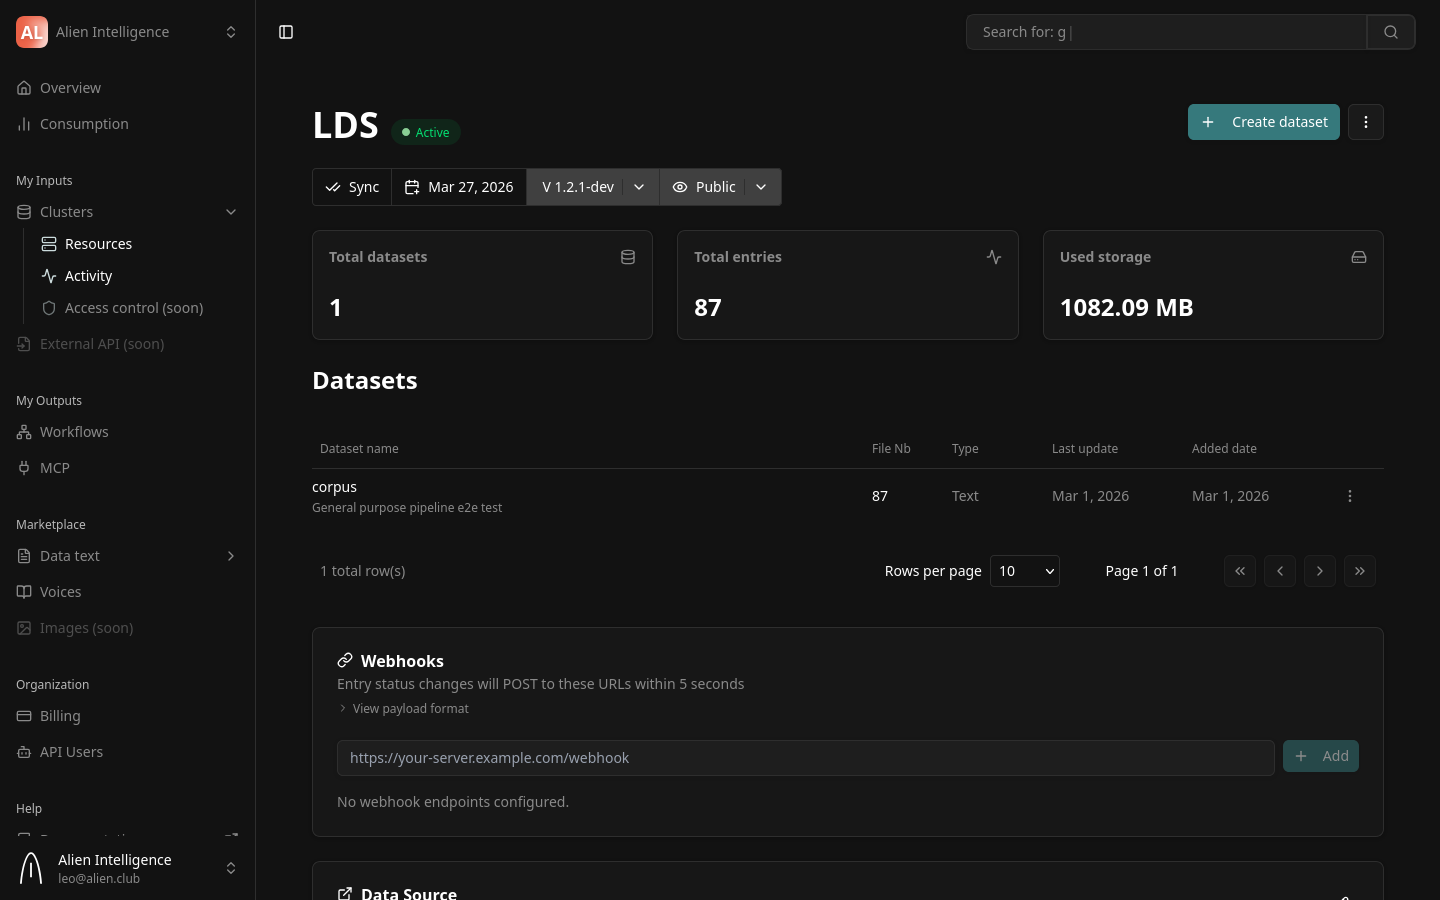
You can click on the cluster to see its detail page, which includes:
- Health status — Per-component health (database, storage, vector DB, search)
- Statistics — Dataset count, total entries, storage usage
- Last heartbeat — When the cluster last reported its status
- Datasets — List of datasets in this cluster
Step 5: Explore Cluster Settings
From the cluster detail page, you can access configuration options:
- Datasets — View, create, and manage datasets in this cluster
- Activity — View recent sync activity and operations
- Settings — Cluster-level configuration
On-Premise: Skupper Tunnel Setup
For on-premise clusters, the network tunnel is established automatically during provisioning by the data plane operator. The operator creates a Skupper connector that exposes the Data API through an encrypted mTLS tunnel.
The tunnel is outbound-only from your infrastructure — no inbound firewall rules are required. If the tunnel disconnects, the cluster continues operating independently, and metadata changes queue locally until connectivity resumes.
If you experience connectivity issues, check the operator logs:
kubectl logs -n data-cluster-operator deployment/data-cluster-operator --tail=100
Cluster Lifecycle
After creation, your cluster moves through these states:
| State | Description |
|---|---|
| Provisioning | Infrastructure resources are being created |
| Active | Cluster is healthy and ready for data operations |
| Degraded | One or more components are unhealthy |
| Offline | No heartbeat received within the timeout period |
The platform monitors cluster health continuously through 30-second heartbeats. If a component becomes unhealthy, the status updates automatically.
Next Steps
Your cluster is ready. Continue with:
- Create a Dataset — Define a dataset, choose a schema, and configure a processing pipeline
- Data Clusters (Concept) — Understand cluster architecture, isolation, and infrastructure
- Datasets and Entries (Concept) — Learn about the data model before creating datasets